
 www.facebook.com
 Hello everyone! Today, we're diving deep into the world of at-home gel nail kits. Specifically, I'll be reviewing the "LuxeGels Pro Kit" which promises salon-quality results from the comfort of your own home. I'll be breaking down my experience using the kit, highlighting its pros and cons, and providing a step-by-step guide on how to achieve the best results with it.
Review: LuxeGels Pro Kit
The LuxeGels Pro Kit markets itself as an all-in-one solution for professional-looking gel manicures at home. The kit includes a UV/LED lamp, a variety of gel polish colors, a base coat, a top coat, nail prep tools (buffer, file, cuticle pusher), and cleanser wipes. My initial impression upon unboxing was positive; the packaging was sleek, and everything felt well-organized.
The lamp is compact and easy to use, curing the gel polish effectively within the advertised timeframes. The polish colors are vibrant and offer good pigmentation with just two coats. However, I found the base coat to be slightly thin, leading to some initial chipping within a few days. The top coat, on the other hand, provided a beautiful, glossy finish. The included nail prep tools are of decent quality, but a more robust cuticle pusher would be a welcome upgrade. Overall, I'd give the LuxeGels Pro Kit a 4 out of 5 stars. It's a great option for beginners looking to explore at-home gel manicures, but experienced users might find some of the components lacking.
How to Apply Gel Polish Using the LuxeGels Pro Kit (or similar kits)
This is a step-by-step guide on achieving a professional-looking gel manicure using the LuxeGels Pro Kit. Ensure you have all your materials prepped and ready before starting.
Thorough nail preparation is crucial for a long-lasting manicure. Start by removing any existing polish. Use the included nail file to shape your nails to your desired length and style. Gently push back your cuticles with the cuticle pusher. Buff the surface of your nails with the buffer to remove shine and create a slightly rough surface for the gel polish to adhere to.
Use the cleanser wipes provided (or rubbing alcohol on a lint-free wipe) to thoroughly clean your nails. This removes any oils or residue that could prevent the gel polish from adhering properly. Ensure your nails are completely dry before proceeding.
Apply a thin, even layer of the base coat to each nail. Be careful not to get any product on your skin or cuticles. If you do, use a clean orange wood stick to wipe it away before curing. Cure the base coat under the UV/LED lamp for the recommended time (usually 30-60 seconds, consult your kit instructions).
Apply a thin, even layer of your chosen gel polish color to each nail. Again, be mindful of getting product on your skin or cuticles. Cure under the lamp for the recommended time. Repeat this step for a second coat, curing after each application. Two thin coats are typically better than one thick coat for even coverage and proper curing.
Apply a thin, even layer of the top coat to each nail. This provides shine and protects the color. Cure under the lamp for the recommended time.
After curing the top coat, your nails may feel slightly tacky. Use the cleanser wipes (or rubbing alcohol on a lint-free wipe) to remove this sticky residue. This reveals the glossy finish.
Apply cuticle oil to your cuticles to hydrate them and prevent them from drying out. This helps to maintain the health and appearance of your nails.
Conclusion
The LuxeGels Pro Kit offers a convenient and relatively affordable way to achieve salon-quality gel manicures at home. While some components could be improved, the kit is a great starting point for beginners. By following the steps outlined above, you can create beautiful, long-lasting gel manicures that will save you time and money compared to regular salon visits. Experiment with different colors and techniques to find what works best for you! Happy painting!
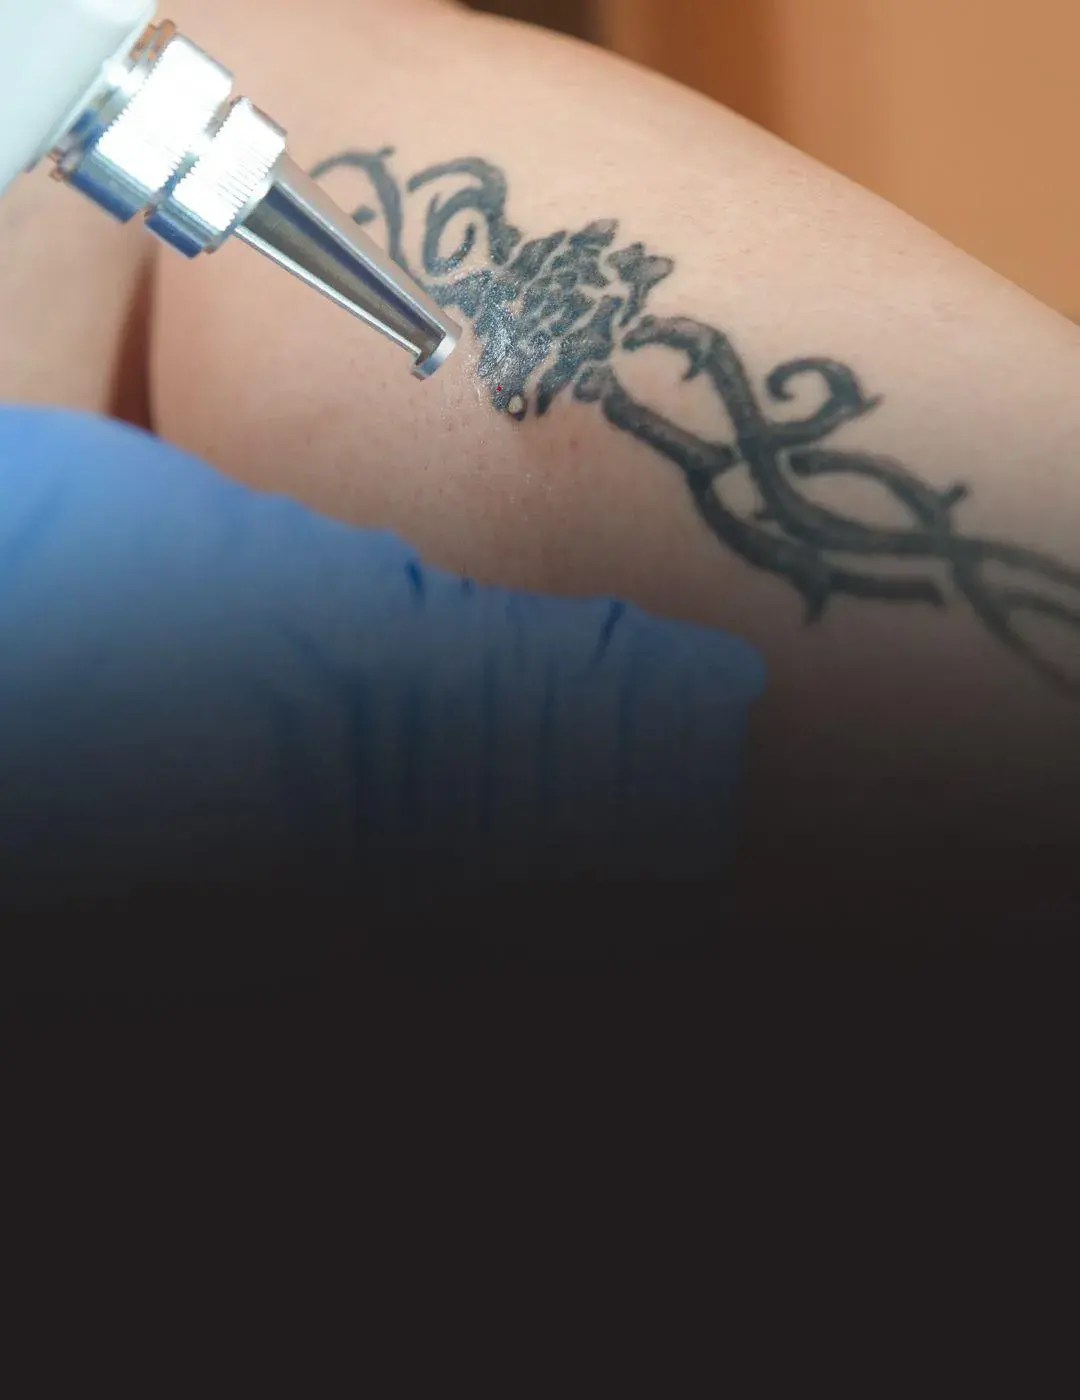
Tattoo Removal Kenya
www.facebook.com Get The Best Tattoo Removal Services In India At Kingleo Tattooz
 kingleotattooz.com
 $197 Flat Fee Tattoo Removal Cost Toronto ️ Tattooregret.ca
 tattooregret.ca


0 komentar:
Posting Komentar